
Shotguns can be used by all classes except Infiltrators.
While NC05 Jackhammer is technically a shotgun, it’s covered in Heavy Weapons Guide.
Shotguns are short range weapons that fire multiple pellets with each shot. They can sustain fire without losing accuracy and easy to deal some damage with.
There is some variety among shotguns: full-auto shotguns rip infantry apart, pump-action shotguns can potentially kill in one shot and semi auto shotguns offer the longest effective range and versatility.
A big part of using a shotgun is getting close to enemy in one piece, preferably without even being noticed. After you get close, you have to engage in a specific way: aim as closely to enemy center mass as possible, while firing at maximum rate of fire and pushing through recoil.
You have to make sure that at the moment of the shot, your crosshair is actually on the enemy. In this regard, shotguns are noticeably different from typical automatic weapons.
[spoiler title=”Shotguns take no skill to use?”]
Shotguns are supposed to be weapons that don’t require good aim from the user. The whole point of firing multiple pellets is to make it easier to inflict damage on the target.
However, since shotguns require multiple shots to actually kill the enemy, in order to have a competitive time-to-kill, you have to make sure that every shot lands as many pellets as possible while shooting at maximum rate of fire and pushing through recoil.
It can be very challenging to consistently land all shots in this manner, especially on a moving target.
It’s true that shotguns don’t require aiming skills to deal some damage. But in order to deal enough damage to actually kill the enemy in a reasonable amount of time, shotguns still require pinpoint aim at center mass.
There is an additional hurdle that at close ranges of 3-5m, even half a sidestep by the enemy can mean missing your entire pellet spread, which is very punishing for shotguns’ low rate of fire.
It’s also hard to consistently get close to enemies. It is possible to camp near a doorway and wait for enemies come to you, and in that regard shotguns are somewhat cheap. But camping is possible with every weapon, and mines can be used for the same purposes, nobody complains about them. It’s a question of cheesy tactics, not cheesy weapons.
There’s also a stone wall of range beyond which shotguns become absolutely useless, while CQC automatic weapons are at least somewhat usable beyond their effective range.
[/spoiler]
Shotgun Mechanics
Before you start using shotguns, you should learn how they work.
(all shotguns) Headshot Damage Multiplier: 1.5x
(all shotguns) ADS movespeed multiplier: 0.75x
For the most part, shotguns obey the same weapon mechanics as other firearms, but Pellet Spread brings an additional layer of randomness.
Pellet Spread
[spoiler title=”GIF Demonstration of Pellet Spread Mechanics”]
- Black circle is Cone of Fire
- Green circle is Pellet Spread
- Orange Square is crosshair
- Red Dots are pellets
For each shot, Pellet Spread has a new random position within Cone of Fire.

Hip Firing

Aiming Down Sights
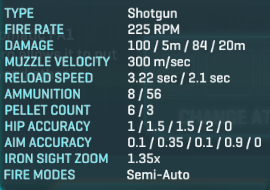
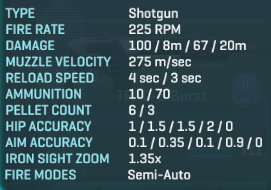
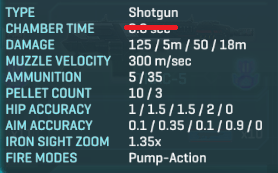
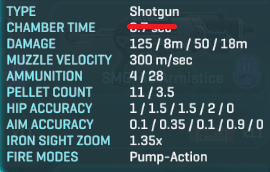
Shotguns fire multiple pellets with each shot. Each individual pellet behaves like a miniature bullet, doing damage listed in the DAMAGE field. The number of pellets is listed in the left part of PELLET COUNT field.
These pellets are randomly distributed within the cone called Pellet Spread. Its center is a random point within Cone of Fire.
Pellet Spread varies depending on shotgun. Same as CoF, It’s measured in degrees. There are different Pellet Spread values for hip firing and for ADSing.
Hip Fire Pellet Spread is visible in-game, to the right of the PELLET COUNT field.
ADS Pellet Spread is not visible in game, but it is listed in this guide. In general you can expect ADS Pellet Spread to be 0.25 – 0.5 degrees smaller than Hip Fire Pellet Spread, except for Pump Action Shotguns – they always have the same pellet spread.
Overall, Pellet Spread determines how closely the pellets land to each other, and Cone of Fire determines how closely the Pellet Spread lands to your crosshair.
Cone of Fire depends on your stance and whether you are hip firing or aiming down sights. Cones of Fire for different stances are listed in the HIP ACCURACY and AIM ACCURACY fields, but they take same values for most shotguns:
- Hip Stand Move CoF = 2.0 degrees
- ADS Stand Move CoF = 0.9 degrees.
- NS G5 Baron is an exception, and has ADS Stand Move CoF of 0.7 degrees.
- ADS Stand Still CoF = 0.1 degrees.
Shotguns do not have Cone of Fire Bloom.
Pellet Coverage
Pellet Coverage is the total area where your pellets can land. It is equal to the sum of Pellet Spread and Cone of Fire.
Pellet Coverage = Pellet Spread + Cone of Fire
For maximum damage output, you want to hit with as many pellets as possible by keeping Pellet Coverage fully within the target. This is especially important for pump action shotguns, which can OHK if you land enough pellets.
Ways of achieving this:
- Get closer to increase the angular size of the target.
- Reduce Cone of Fire and Pellet Spread by aiming down sights
- Reduce Cone of Fire by standing still and/or crouching.
- For hip firing, reduce Cone of Fire with Laser Sight attachment
Of course, you don’t have to land all pellets all the time.
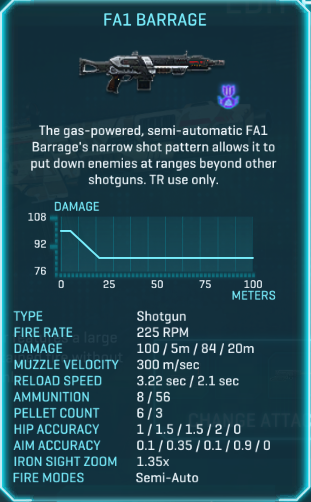
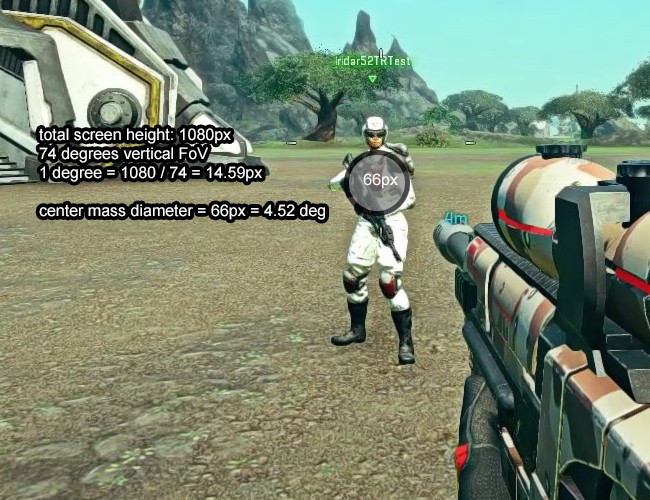
[spoiler title=”Pellet Coverage Example”]Let’s use FA1 Barrage for this example. The most common way to engage an enemy with a shotgun is to hip fire while moving:
Hip Stand Move CoF: 2.0
Hip Fire Pellet Spread: 3.0
Pellet Coverage = 2 + 3 = 5 degrees
Judging by this picture, standard infantry target’s center mass will have size of <5 degrees within ~3.5m. Past that, you’re likely to start missing pellets.
If you use Laser Sight:
Hip Stand Move CoF with Laser Sight: 1.34
Pellet Coverage = 1.34 + 3 = 4.34 degrees
This will give you about 1m of extra range.
If you stand still and aim down sights:
ADS Stand Still CoF: 0.1
ADS Pellet Spread: 2.5
Pellet Coverage = 0.1 + 2.5 = 2.6 degrees.
According to this picture, it will boost the range of full pellet coverage to ~6.5m.
[/spoiler]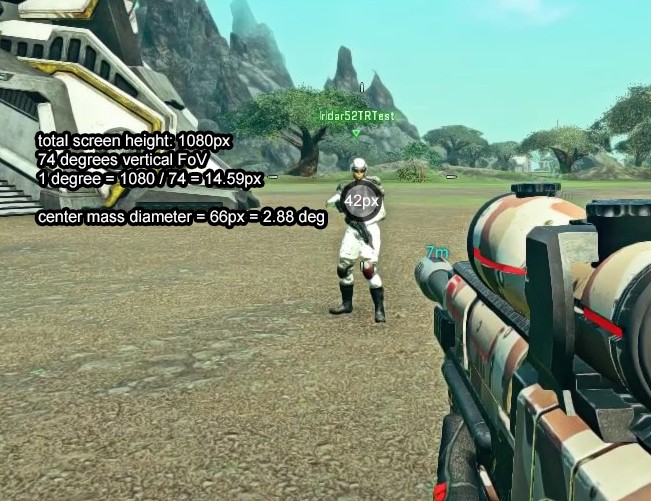
Shotgun Crosshair
Shotgun hip fire crosshair size depends on both your current Cone of Fire and Pellet Spread. More accurate shotguns will have smaller crosshair. However, shotgun crosshair is not affected by Laser Sight.
Tube Magazine Reload Time
Some shotguns have Tube Magazines, that require each shell to be loaded individually, so the more shells you have to load, the longer the reload process will take. Loading the first shell takes longer than all shells after that.
Reload times for tube magazines are hidden and can’t be seen in the game, but they have been pulled from Census API and confirmed by in-game testing, and listed in this guide.
Reload process of a tube magazine can be interrupted at any time, but it will come after a short delay.
If you empty the whole tube magazine of a Pump Action shotgun, or start the reload without chambering a new round, you will also have to cycle the pump mechanism before you are ready to fire.
Pump Action Chamber Time
The chamber time listed on in-game weapon stat sheet doesn’t tell the whole story. You can learn more about it here, or just use values provided in this guide.
Overview of all Shotguns
While shotguns have different names and models between factions, they can be split in groups, and are nearly identical within a group.
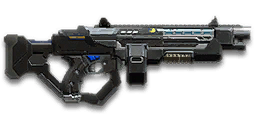
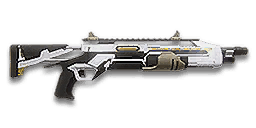
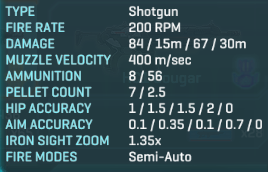
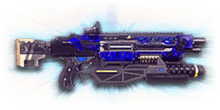
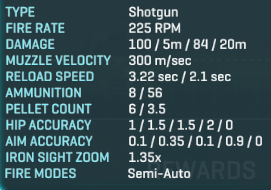
Starting Shotguns – Quick Reload
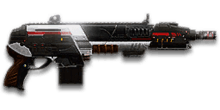
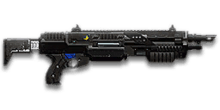
FA1 Barrage
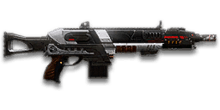
Mauler S6
Thanatos VE70
-25 m/s velocity, no bullet drop with buckshot
Extended Mags Bonus: 2 shells
ADS Pellet Spread: 2.5
Vertical Recoil: 2.8
Horizontal Recoil: 0.5 / 0.5
Horizontal Recoil Tolerance: 1.5
These semi-auto shotguns are available for free to all characters. Tight spread and quick reload makes them the middle ground of the shotgun world, and a good point to start from, to see if shotguns suit you at all.
In ideal conditions: very close range, good accuracy and a surprise advantage, they can kill standard infantry in just a couple of shots.
But against a hardened target and without perfect accuracy, they may take as many as 4-5 shots to kill.
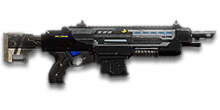
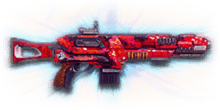
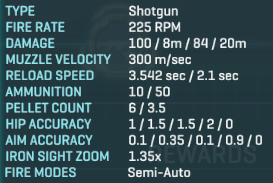
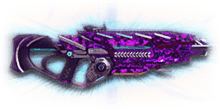
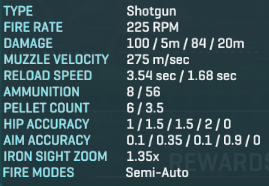
High Capacity Shotguns
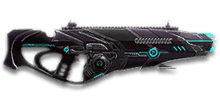
TS4 Haymaker
NC12 Sweeper
Nova
-20 m/s velocity, no bullet drop with buckshot
ADS Pellet Spread: 2.75
Vertical Recoil: 2.5
Recoil Angle: 12 / 12
Horizontal Recoil: 0.65 / 0.65
Horizontal Recoil Tolerance: 1.5
These semi auto shotguns have larger magazines than starting shotguns, and allow to carry more spare ammunition, at the cost of longer reload and shorter effective range.
They make a good combination with Laser Sight, as good default capacity allows them to ignore Extended Mags attachment.
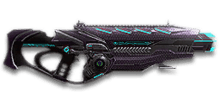
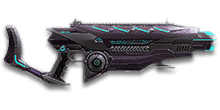
Full Auto Shotguns
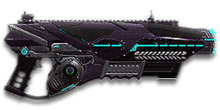
AS16 NightHawk
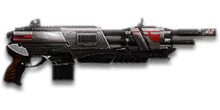
AF-57 Piston
Pandora VX25
-25 m/s velocity, no bullet drop with buckshot
ADS Pellet Spread: 3.5
Vertical Recoil: 2
Horizontal Recoil: 0.95 / 0.95
Horizontal Recoil Tolerance: 5
Full-auto shotguns have the most limited range, but within that range are extremely deadly. They have the most damage degradation, but within maximum damage range, deal the highest damage per shot. This is the only type of shotgun that can reliably melee combo enemies even through full nanoweave.
Automatic firemode makes them easier to use, and easier to transition to from other CQC weapons. Full auto shotguns tend to waste a lot of ammo per kill, and generally run out of ammo fast, but the unstoppable volume of fire makes them most reliable when it comes to killing 1-2 enemies at close range. You still should try to flank as much as you can, but mostly to make sure you get close enough before blazing away. You don’t really care if enemy knows you’re coming or not.
Full auto shotguns have the largest pellet spread, but with the amount of lead they send down range it just doesn’t matter. Also, large pellet spread can actually help fighting enemies in extremely close quarters, ensuring that even if you don’t aim perfectly at the enemy, you still hit him with at least a few pellets.
While they have a bit less Vertical Recoil per shot, Full Auto shotguns have incredibly strong Horizontal Recoil, which makes the weapon slide along horizontal plane a lot.
Pump Action Shotguns
First Generation
TRS-12 Uppercut
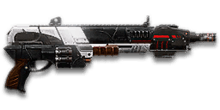
GD-66 Claw
Phobos VX86
-25 m/s velocity, no bullet drop with buckshot
ADS Pellet Spread: 3
Time Between Shots: 0.75 sec
Long Reload: 1.1 sec
Short Reload: 0.7 sec
Second Generation
TAS-16 Blackjack
LA39 Bruiser
Deimos VA29
-25 m/s velocity, no bullet drop with buckshot
ADS Pellet Spread: 3.5
Time Between Shots: 0.85 sec
Long Reload: 1.2 sec
Short Reload: 0.72 sec
Pump action shotguns fire considerably more pellets per shot, which gives them huge damage per shot. A precise shot at close range will one-hit-kill (OHK). However, pump mechanism needs to be cycled after each shot, which dramatically reduces effective rate of fire.
There are currently two pump shotguns for each faction, first and second generations. First generation has tighter spread and fires and reloads a little faster, and the second generation fires an additional pellet per shot, dealing more damage per shot, which results in increased chance of OHK at close range.
Ultimately, the difference between them is tiny, and it’s nearly impossible for the user to tell them apart by their performance.
High damage per magazine and potential to exploit a favorable situation makes pump action shotguns best suited for flanking.
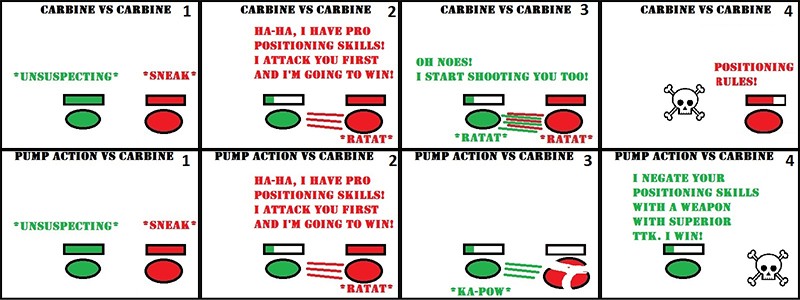
Potential OHK is a huge advantage – it gives you ability to remove an enemy before he gets to even think about responding, and due to internet delay – often before he can see you. Or you can OHK an enemy even after he started shooting at you. Normally, firing first gives a huge advantage, but OHK can negate that advantage, as presented in the comic below:
The biggest problem with pump action shotguns is that most of the time target does not die from the first shot, and then you have to wait through painfully long pump mechanism cycle, which is longer than time to kill of most automatic weapons in close quarters.
The long refire time must be mitigated by stepping in and out of cover between shots. You will also be gaming on internet delay that way, often shooting the opponent on your screen before appearing on his screen.
Example video. Pay attention to movement.
But if you engage an enemy in close quarters without available cover, and the enemy doesn’t die from the first shot and you are stuck cycling the pump mechanism, you’re at a huge disadvantage. That’s with a shotgun within effective range!
So stick to cover, and if there’s no cover – ADS, aim very-very well, and pray for an OHK. If you don’t get OHK – stop ADSing and strafe erratically and try to survive until you have another shot.
Tip: Equipping most sidearms takes 0.5 seconds, while pump action shotguns take 0.75-0.85 seconds to cycle, so if the target survived the first shotgun shot, it may be worth finishing it off with a sidearm instead of waiting for pump mechanism to cycle.
On another note, there’s a nice feature that each shot with a PA shotgun is as accurate as it can be, as the recoil has time to fully settle between shots, effectively nullifying one of the shotguns’ biggest disadvantages – strong recoil.
Pump action fires slowly, and forces the user to time his shots and conserve ammunition, and since there’s a chance to OHK – there’s a bit more leeway in lining up shots.
High count of pellets per shot also means that you’re very likely to do at least some damage to the target, so what PA shotgun didn’t kill in one shot, it’s likely to kill in two.
Melee Combo Interactions
Pump Action shotguns have an interesting interaction with quick melee attacks: you can quick melee during the chamber animation. Learn more about it here.
Normally, this trick would be redundant, because you can perform quick melee attacks only at point blank range, where any PA shotgun should reliably OHK any infantry target, unless it’s running full Nanoweave and Aux. Shield. However, PA shotguns are often hard countered by Heavy Assaults’ overshields, and this is where a melee strike comes in, able to reliably kill any shielded HA after a PA shotgun shot.
NS Shotguns
NS Baron G5
ADS Pellet Spread: 2.25
Vertical Recoil: 2.2
Recoil Angle: -12 / -12
Horizontal Recoil: 0.45 / 0.45
Horizontal Recoil Tolerance: 1.5
Long Reload: 0.58 secs
Short Reload: 0.5 secs
Baron has the longest effective range among shotguns due to tightest in class Pellet Spread, as well as marginally better Stand ADS Move CoF.
There is a small price to pay: Baron fires slower, does less damage per shot, and can do less damage before having to reload, even with Extended Mags.
Baron isn’t as deadly as full auto or pump action shotguns, but it doesn’t lose much when compared to other semi autos. In the end, the total amount of shots to kill is about the same and often Baron can even kill a target in fewer shots due to superior accuracy.
Baron’s tube magazine takes longer to fully reload, especially with Extended Mags, but the advantage is that you can quickly load up a couple of shells between engagements, as well as interrupt the reload process if situation calls for it.
Comparatively long effective range makes Baron by far the least frustrating shotgun to use. Sometimes it’s possible to reach out to enemies as far as 20m out, which is unheard of.
Auraxium Shotguns
Havoc
+2 rounds per mag
ADS Pellet Spread: 2
Vertical Recoil: 2.8
Horizontal Recoil: 0.5 / 0.5
Horizontal Recoil Tolerance: 1.5
The Brawler
+Underbarrel Shotgun
ADS Pellet Spread: 2
Vertical Recoil: 2.8
Horizontal Recoil: 0.5 / 0.5
Horizontal Recoil Tolerance: 1.5
Chaos
+Super Quick Reload
ADS Pellet Spread: 2
Vertical Recoil: 2.8
Horizontal Recoil: 0.5 / 0.5
Horizontal Recoil Tolerance: 1.5
These prestige shotguns with unique “alive” camouflage shader can’t be purchased with certs or station cash, and can only be acquired through Directives. To get one of these, you have to complete the auraxium tier of shotgun directives, by earning auraxium medals with 5 different shotguns (gold and black variants count, but not AE or P variants).
Auraxium shotguns are very similar to starting shotguns, but they have larger Hip Fire Pellet Spread and smaller ADS Pellet Spread. This makes the decision whether to ADS or not more impactful, and increases maximum effective range.
In addition, each auraxium shotgun has a bit of faction flavor: Havoc gets larger magazine, Chaos gets faster short reload and Brawler gets an Underbarrel Shotgun attachment. Yes, it’s a shotgun on a shotgun.
Attachments
Extended Magazines is a no-brainer attachment for the rail slot in almost all cases
Laser Sight reduces hip fire CoF by 33%.
If we take Standing Moving Hip CoF of 2.0, it will be reduced to ~1.33 degrees, reducing total pellet coverage by 0.67 degrees, and increasing effective range by about 1m.
Not a huge difference. If you require more range, it’s better to aim down sights. This will both reduce CoF better than Laser Sight would, and will also reduce Pellet Spread with most shotguns.
Forward Grip reduces Horizontal Recoil and Horizontal Recoil Tolerance. This is worthless for most shotguns, with the exception of Full Auto Shotguns, which suffer from abnormally high Horizontal Recoil and Tolerance.
[spoiler title=”Forward Grip for Full Auto Shotguns”]
Here is a comparison of how your Pellet Coverage looks on Auto Shotgun if you ADS and fire at full auto at an enemy within 5m.
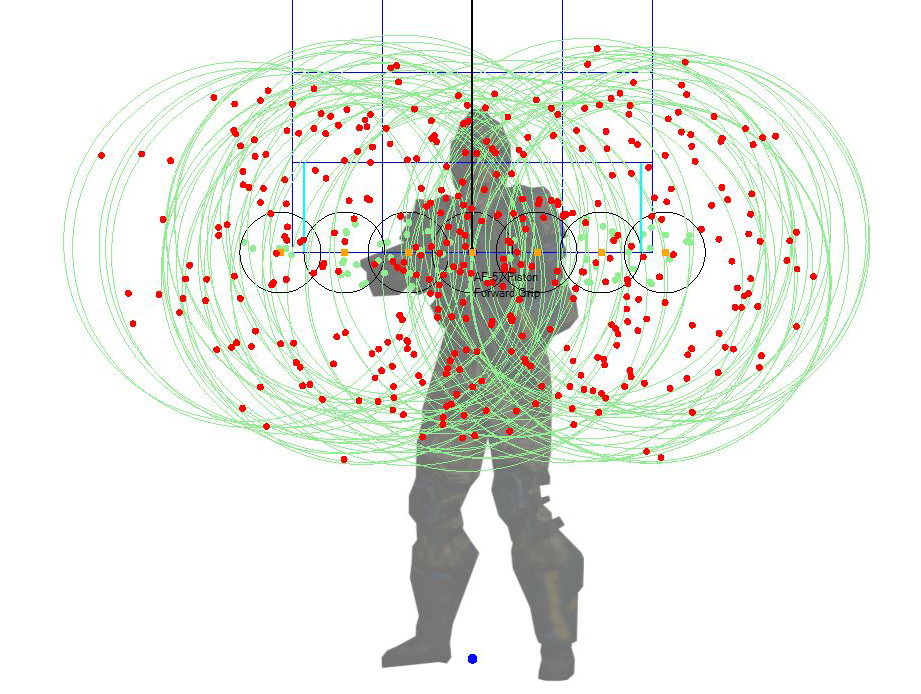
Autoshotgun with FG

Autoshotgun no FG
[/spoiler]
1x Reflex sight is handy to be able to ADS conveniently, if situation calls for it, or a HS/NV scope to give yourself a better vision at night.
Slug Ammunition ammo attachment has such a strong effect on shotgun performance that it has a separate section dedicated to it.
Shotgun Loadout
Whatever shotgun you choose, you do not want to run with it all the time, but switch to shotgun loadout when you get in a fight with lots of close quarters fighting.
There are a few equipment pieces that can make shotgunning easier, though they are not absolutely necessary.
Suit Slot
You’re gonna engage in CQC a lot. It’s a dangerous place, and you won’t always have the choice to engage the enemy on best terms, so Nanoweave Armor is gonna come in handy.
Sidearm
Since the optimal way of using a shotgun requires a lot of spamming shots, Shotguns tend to run out of ammo in hectic CQC situations.
Also, sometimes you may be forced to engage an enemy completely outside your shotgun’s effective range.
So you want to pick a sidearm that has relatively long effective range, can kill a full health enemy at range and can be used as finisher in close quarters, either through damage per shot or volume of fire.
Feel free to browse through the Sidearm Guide, but the short of it – any semi auto pistol or a revolver will do just fine.
NS-44L Blackhand specifically gets recommended a lot. However, from my personal experience of using it, the downside was that I kept using Blackhand more than my actual primary weapon.
Grenade
Flash Grenade for Light Assault and Concussion Grenade for Heavy Assault – both have good synergy with shotguns, but getting good hits with these grenades on multiple enemies is not easy.
Implant
Shotgun users spend a lot of time running around, getting close to enemies. So they naturally benefit from implants related to combat awareness and minimap.
Counter Intelligence will make flanking enemies much easier, and it’s also useful for making plays near cover. It is a human instinct to “address the threat”. When you get under fire, you naturally want to see who’s shooting at you. But often if you do, you will not have enough time to retreat to safety or fight back. If you are able to break this bad habit, this implant will be useful to you.
Example situation: you run a shotgun loadout, and run on a rooftop. Somebody shoots you, you see hit markers and enemy pops up on the minimap.
You jump down from the edge of the roof, so the building is behind you and the enemy. If he tries to pursue and run around the building, you will be ready for him, you will know when exactly to pop out from around the corner and blast him in face.
Sensor Shield 4+ will passively make you less likely to be detected by Motion Detection Tools, giving you a higher chance of catching enemies unaware.
Shotgun users do a lot of blind rushing, and Sweeper HUD implant can warn about enemy explosives behind the doorway.
Nightmare 5 makes a funny and cheesy combination with Shotguns, especially with pump action ones, but it’s not as useful as you might think. You can’t always guarantee killing an enemy within 5m, and the cloak itself is not effective at close range.
Catlike 5 is excellent for moving around; it opens new ways of getting close to enemies.
Melee
While shotguns already give you a lot of power in melee range, there is a couple of tricks you can pull off with your knife.
One shot with a pump action shotgun and one knife swing will instantly kill a Heavy Assault through overshields. Same goes for 2 shots with other shotguns, followed by a knife swing.
Unfortunately, non-pump action shotguns do not deal enough damage per shot to reliably kill infantry – they will survive the melee combo if they have Nanoweave Armor. If you’re going for a melee combo, do your best to aim in the head-neck area, so a few pellets hit the head, making sure the knife strike will be lethal even if the target has nanoweave.
Playstyle
Shotguns’ effective range is so short that you’ll probably have to move closer to every enemy before you can try killing them. So using a shotgun is a simple cycle of: move to enemy -> engage -> move -> engage -> etc.
Positioning
When you first arrive into a fight, take a look at the minimap, figure out where enemies are and how you can get close to them. Stick to cover and try to be stealthy and pay constant attention to the minimap. Avoid large open spaces as much as you can. Learn base layouts and where people usually hide or camp.
If you manage to get within 5-10m, you can engage. For this, skip to the next section “Aiming and Firing”.
But it is impossible to consistently get within 10m of the enemy. A lot of the time, skill in using a shotgun is not in getting close to enemies, but in what to do when things go wrong.
If you get spotted or shot on approach and you can’t get close to the enemy before you get killed – abort mission and try to find cover. Then, depending on situation, either wait for enemy to come to you, or try to move away from the enemy and look for another route.
If there’s no cover around, and you’re just stuck in the open, you probably made a positioning mistake and you’re gonna die. Learn from it and move on. As a last ditch effort, you can try engaging the enemy with your sidearm, but odds aren’t in your favor.
Aiming and firing
It’s almost always better to aim for center mass to maximize the number of pellets that hit the target.
Shotguns do only 150% damage on headshots instead of usual 200%, so I don’t recommend aiming at the head, unless the enemy is something like a shielded Heavy Assault at extremely close range.
Some people have a reflex to start shooting first, and “zero in” (acquire aim) on the target while shooting. It’s a bad habit, but it somewhat works with automatic weapons. With shotguns, you absolutely can’t do that. Take a moment to make sure your crosshair is on your target, and only then shoot.
A couple examples of what happens if you do not take that extra moment to aim:
Just having a shotgun and enemy within 3m of you is not an automatic victory. You still have to aim and fire properly!
Shotguns have no Cone of Fire Bloom, and usually take 3-4 shots to kill the enemy, so to maintain competitive Time to Kill, you must shoot as fast as you can, pushing through the recoil and trying to hold the crosshair on enemy’s center mass.
Make sure to Aim Down Sights if the enemy is more than 3-5m away from you.
Standing completely still will also provide a small boost in range/accuracy, but it’s rarely a good idea to stand around in CQC. One situation when this can be useful is if you’re flanking an unaware enemy, and don’t want to expose yourself by moving too close.
To recap:
- Aim at center mass
- Try to sustain maximum rate of fire
- Compensate for recoil
- Fire only when crosshair is on the target
- Aim down sights if the enemy is further than 3-5m away
Slug Ammunition

All shotgun primaries except for NC05 Jackhammer heavy weapon have access to slug ammunition.
All shotguns fire buckshot by default, but have an option to use Slug Ammunition, which is, in essence, shotgun bullets. Slugs are used to make the shotgun viable in 20-30m range segment at the cost of reducing effectiveness at extremely close range.
Statistics
Damage:
- Full Auto and Semi-Auto slug damage: 500 @ 10m – 360 @ 40m
- Pump Action slug damage: 800 @ 10m – 400 @ 40m
- Remember, that shotguns do 150% damage on headshots instead of usual 200%, and it affects slugs too.
CoF Penalty: Slug Ammunition increases hip fire Cones of Fire by 75%.
Velocity: TR and NC slugs inherit the Projectile Velocity of the shotgun they’re used with. Baron G5 and all VS shotguns have slug velocity of 300 m/s.
Projectile Drop: slugs have lower Gravity than most primary weapons (8 vs 11.25), so they are less affected by projectile drop. VS slugs do have projectile drop.
With 300 m/s and lower gravity, slugs have the same amount of drop as a weapon with standard gravity and 422 m/s would.
Pellet Spread: Slug Ammunition completely ignores Pellet Spread stat.
How to use slugs
Due to slug ammo Hip Fire CoF penalty, slugs are unreliable when hip fired. With a slug shotgun, it’s best to always aim down sights, unless enemy is within knifing distance.
If the enemy is relatively close, you can spam shots and push through recoil, same as with buckshot. If the enemy is a bit further away, it is recommended to wait for the crosshair to fully settle between shots. This technique is called “tap firing” and described further below.
Slugs are often misunderstood: they make a shotgun shoot powerful bullets at low rate of fire, so people naturally conclude “it’s similar to a battle rifle!”. The truth is, slugs don’t magically make your shotgun a ranged weapon. It remains a CQC weapon, even if the effective range does increase by a large margin.
With slugs you can easily reach targets within 15-20m, but you do have to ADS and make sure to actually aim on target, and taking a semi-automatic “hit or die” weapon into CQC environment is not a great idea. Any CQC automatic weapon user will just run circles around you.
Overall, slugs are more of an interesting challenge rather than an effective combat option. They’re a good choice if you get frustrated by total lack of effective range of normal buckshot, but they’re not superior to conventional automatic weapons.
Based on posts by Erendil of PS2 Forums
As someone with ~3,500 slug kills (Pandora and Nova) and maintaining a ~3.7 KDR while doing so, IMO slugs are NOT useless – at least not on auto/semi-auto shotties (PA slugguns are a different story). Once you get a feel for their COF and recoil, they can be effective out to about 40m or so, and can still frequently kill out to maybe 75m.
Here’s a few thoughts on how I use auto/semi-auto slugguns:
Always use Ext mags – foregrip gives almost no benefit, and their hipfire is total crap even with a laser equipped. With slugs you’ll burn through that mag very quicky, and every miss really hurts your kills per mag, so you want as many shots in that mag as possible
You’ll go through ammo quickly, so Engie is IMO the best class for this. Although LA’s mobility, ambush potential, and ability to quickly go back for more ammo makes it viable for them too
Don’t use anything greater than 2x sights – anything higher is a waste due to the relatively short effective range (FWIW I use 2x)
Always ADS unless you’re within knifing range.
1 headshot + quicknife will kill even Nano5 targets. 1 body shot + quicknife will kill non-Nano targets
They’re a great ambush weapon. If you get the element of surprise go for a headshot on the 1st shot if possible. You’ll be surprised how many injured opponents you can OHK with 750 Alpha damage.
After the first shot, don’t go for headshots past 10m or so. The 1.5x headshot multiplier plus high recoil and large CoF makes it not worth praying to the RNG gods.
You should be able to strafe while firing and maintain accuracy out to 25-30m IF you keep your recoil under control.
Anything past 25-30m, you have 3 options:
1) Stop strafing, this can be a death sentence. It’s only wise to do this if you have the initiative or have decent cover to fire from.
2) Crouch. It will cut your ADS moving COF more than in half, down to a much more manageable .35 – comparable to an LMG. Not great, but good enough for mid-range firefights.
Crouch-firing will let you maintain accuracy at near full semi-auto ROF out to ~40m. And since your ADS Movement multiplier is .75x, crouching doesn’t make you quite so horrendously slow as many other weapons would.
Don’t stay crouched for too long though, or you’ll be asking for a sniper bullet to the cranium. Fire off a couple of shots, then get up and move, re-crouch and fire of a few more shots, then get back up, etc. You can also pop in and out of cover like this too.
3) Disengage – Don’t attack. Either find some way to close the distance, or retreat, set up an ambush and let your opponent come to you.
Sniping with slugs
Shotguns with slugs have a combination of traits that makes them bad at long range fighting:
- Extreme recoil, which forces the user to take long pauses between shots.
- Low velocity.
- Very bad “moving” CoFs, forces the user to stand still for firing at any meaningful range.
Slugs are optimal up to 20m, viable up to 30m. Make sure you’re within that effective range before engaging. Don’t expect to have an easy time taking out a remote target.
That said, on occasion, you will be able to reach out to distant targets.
Shotguns are pretty inaccurate on the move, so if you want to hit anything with a slug at range, you have to make sure to be stationary and aim down sights while shooting. This puts you at huge risk from enemy snipers, unless you’re in a good position.
Let the crosshair fully return to original position between shots. This is called Tap Firing. Example of this can be seen in my video “Night Patrol” at 2:03.
Tap Firing is necessary for sufficient accuracy, but it creates long pauses between shots.
As explained here, different shotguns take different time to fully settle between shots.
Most enemies at long range will require 3-4 hits to die, and they won’t stand still for ~1.2 seconds while being repeatedly hit by slugs, unless they are caught completely by surprise by your attack.
In this regard, slug sniping has the same issues the normal sniping does: usually it only can kill those who are unskilled enough to stand around for a sniper to line up a shot. There’s not much value in killing a BR5 newbie.
In a normal long-range gunfight, where an enemy shoots at you, and you shoot at the enemy, “sniping with slugs” is nearly impossible. But, if you go around the flank, remain unnoticed, and get an opportunity to line up a shot on an enemy who thinks he is safe, you can try killing him.
This is almost impossible to pull off with a Pump Action shotgun due to long time between shots.
Good targets are stationary reviving medics, engineers behind turrets, snipers. 150m sound like a maximum range for slug sniping, past that you’re likely to miss shots just because even your starting cone of fire is too large to guarantee a hit.
Consider slug shotgun a CQC weapon that can sometimes reach out to far away enemies when circumstances are fitting.
Slugs on Semi Auto Shotguns
Semi-auto slugs can 2 hit kill a target without nanoweave within 10m, but most of the time you will need 3 hits, which will kill a full nanoweave target within 27m.
With semi-auto slugs, it’s recommended to always aim for center mass, unless you have the advantage of the first shot on an unaware target, in which case you might want to try to score a headshot with the first hit, but subsequent shots should be aimed at the center mass regardless.
Which shotgun to use:
High capacity shotguns have slightly less Vertical Recoil, and faster Recentering Time because of it.
Quick reload shotguns have 25 m/s higher velocity and slightly less horizontal recoil.
And then there are magazine size / reload speed differences.
Baron has a bit lower rate of fire, but it does get marginally better ADS Stand Move cone of fire and same velocity as quick reload shotguns.
Overall, the differences in slug performance between these shotguns are marginal at best, so feel free to use just whichever shotgun you have, or whichever you like the most.
Slugs on Full Auto Shotguns
Not recommended. Fun, feels like WH40k Space Marine’s bolter. But ineffective. Extreme ammunition expenditure, extreme recoil, low accuracy, short effective range.
Extreme horizontal recoil makes automatic fire a gamble not in your favor, even with a forward grip. And if you can’t go full auto, you may as well use a semi auto shotgun with better recentering time.
Slugs on Pump Action Shotguns
Slugs on a pump action shotguns are extremely powerful and way more versatile than buckshot. With buckshot you can OHK an enemy within 5m, and if you’re lucky, 2 or 3-shot him within 10m. Past that range your weapon is completely useless. With slugs, you remain potent within ~20m, and at least somewhat viable at longer range.
Pump slugs do 800 @ 10m – 400 @ 40m damage with a 1.5x headshot multiplier. This means that slug will OHK a target on a headshot within 20m, and be a consistent 2 body hit kill even against full nanoweave targets up to 22m, and up to 32m on targets without nanoweave. Infiltrators die on a headshot within 25m.
If you decide to use a PA shotgun with slugs, go with first generation: Uppercut, Claw, Phobos.
Second generation pump action shotguns have lower RoF and longer reload, without any benefits for slugs.
Advantages of using a pump action shotgun with slugs:
- If your target is at all wounded, you will likely instantly finish it off even with one body hit.
- At melee range, 1 slug and 1 knife swing will reliably OHK even full nanoweave target (but not a shielded Heavy Assault).
- A well-placed headshot can instantly kill normal infantry. Your skill as a shooter comes into play before your opponent’s. Basically, if you hit the head – you win. Each and every battle within 20m is yours to lose, and opponent’s skill doesn’t really matter.
- Not countered by other shotguns, since you don’t need to close in to their effective range to be effective yourself.
- Powerful in close quarters against automatic weapons with 0.5x ADS multiplier, because even if target is beyond your hip fire range, shotguns still have 0.75x multiplier, and you can afford to dance around and dodge enemy shots, they cannot.
- Misleading sound. Enemy will never guess you have slugs on your pump shotgun, because nobody uses them. Judging by sound, enemy will mistakenly consider you harmless outside 5m.
- You need only a few shots, so you will be harder to detect by muzzle flash and tracers.
- Absolutely no recoil control is required of you.
- Each shot is as accurate as it can possibly be, because the crosshair has time to fully settle between shots.
You look and sound incredibly cool because KA-POW, shick-shick, KA-POW, and because it’s not mainstream. Venture off the beaten path. You also get to use a shotgun without cheesing.
Slugs fix the biggest issue with buckshot – inconsistency. Buckshot OHKs outside melee range are inconsistent, and heavily dependent on luck and if the target has nanoweave. Slug OHKs depend only on your accuracy and distance to the target. Within 20m, you can expect any infantry target without HA overshield to die in one headshot. And at melee range, you can still “OHK” by adding a melee swing.
Disadvantages:
- Short effective range.
- Requires good aim.
- Requires good FPS.
- Requires good positioning skills.
- Hard countered by HA overshields…. if they manage to get them up in time 😉
- Outclassed by popular automatic CQC weapons with 0.75x ADS multiplier, or weapons with accurate hip fire.
- You have to be stationary to have a chance at hitting a target past 30m distance, because shotguns have bad CoF on the move. And a stationary target is sniper bait.
Attachments to go with Slugs
Rail: Extended Mags vs Forward Grip vs Laser Sight
Extended Mags is viable.
Forward Grip can be useful if you intend to use slugs aggressively, spam shots and push through recoil.
Laser Sight is for hip firing, and hip firing a “hit or die” weapon is not a good idea, especially considering the slug ammo CoF penalty. Laser Sight isn’t nearly enough to overcome it.
Scope: 1x reflex vs. 2x/3.4x/4x sights vs HS/NV
1x reflex recommended for convenient aiming within the effective range of 20-30m.
I don’t recommend using high-magnification scopes with slugs, unless you specifically plan to go to a flanking position and use slug shotgun as a makeshift sniper rifle. High magnification scopes just make this weapon too much “unversatile”, too incovenient to use at close range, and slugs are not good enough at long range to justify specializing the weapon for it.
HS / NV scope is viable, but longer scope-in time can put you at a disadvantage when suddenly an enemy attacks you at close range.
Outdated Videos
These videos are outdated and do not represent current shotgun gameplay in PS2. However, they still posses some recreational and cultural value.
[spoiler title=”Click to open spoiler”] [/spoiler]Share with:
Recent Comments